In this tutorial, you will learn how you can set up your accounts for the autoblogger as well as posting with it.
The Autoblogger activates every time you press Build & Post after setting up a campaign.

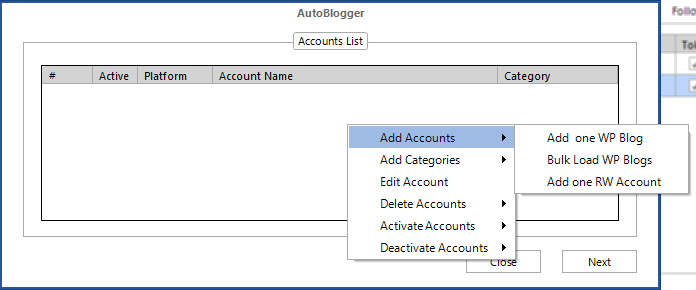
I. The first window that opens up shows you the accounts list:

Right-clicking will bring out the contextual menu with these options:
1. Add Accounts
1.1. Add One WP Blog. Lets you enter the details for one WordPress account
1.2. Bulk Load WP Blogs. You can load a text file with account details for multiple accounts.
Required formatting: Each row in the text file should include one account in the following manner: account_name; URL; username; password
1.3. Add One RW Account. Lets you add one RankWyz account that you can feed content to.
2. Add Categories. Let’s you add new categories (comma-separated) to either the selected or checked blogs.
2.1. To Selected Blogs
2.2. To Checked Blogs
3. Edit Account. You can edit the details of the selected account.
4. Delete Accounts
4.1. Delete Selected Accounts
4.2. Delete Checked Accounts
5. Test Accounts. You can test whether the accounts you have set up are valid.
5.1. Test Selected Accounts
5.2. Test Checked Accounts
6. Activate Accounts
6.1. Check All. This option puts a check mark on all check boxes
6.2. Check All… Here you can type in any part of the account names that you want to activate (comma-separated)
7. Deactivate Accounts
7.1. Uncheck All. Unchecks all checkboxes.
7.2. Uncheck All… Just like with “Check All…” you can type in the account names (or parts of them) which you want to deactivate.
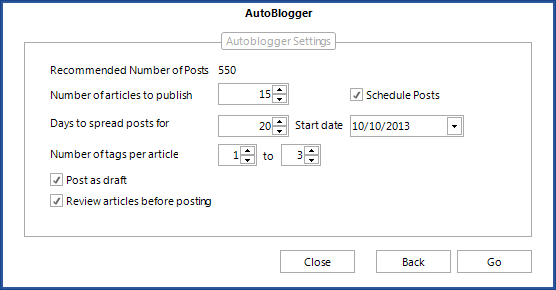
II. The second window is the Autoblogger Settings

1. Recommended Number of Posts. This is the maximum number of articles you can publish without worrying about two articles being the same.
It calculates the possible variations, so anything above that number increases the risk of duplicate content(not whole articles though).
2. Number of articles to publish. The count of articles you wish to post.
3. Days to spread posts for. KontentMachine will spread your posts for as many days as you like.
It is good to know that it will not publish all scheduled articles for the day at one time. Note: For RankWyz you need to set up the schedule inside your RankWyz account.
4. Start date. You can tell KontentMachine when the first post should be published.
5. Number of tags per post. Here you can select the number of tags you would like to have per post.
6. Post as draft. All posts will be saved as drafts in your blogs. Note: It is not applicable for RankWyz.
7. Review articles before posting. If you select this option, you will be presented with the KM Editor, which allows you to make changes to each article.
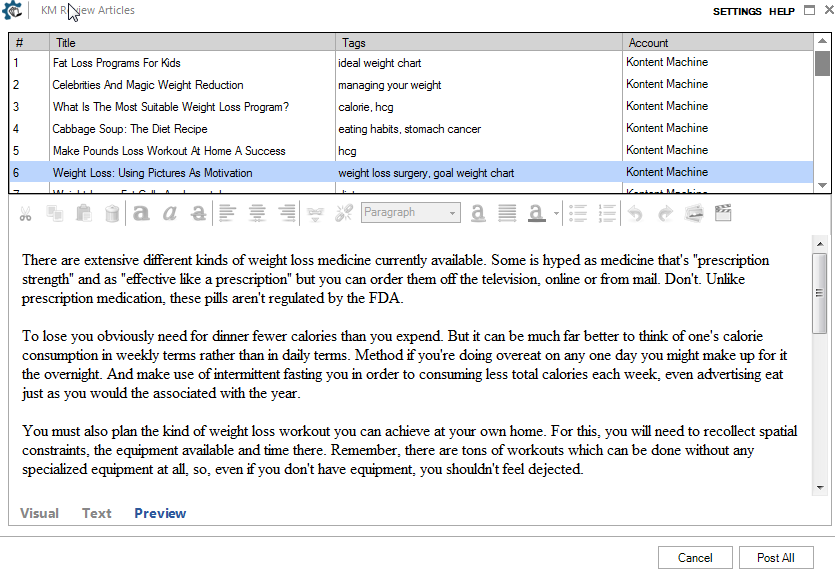
III. KM Review Articles

What you can do with the articles:
1. Get a new title. Right-click select Get a new title
2. Get new tags. Right-click and select Get new tags
3. Delete articles. Select the articles you want to delete, right-click and select Delete Selected Articles
4. Preview the article in your default browser. Right-click and select View In Browser
5. Modify the title. Double-click on the title.
6. Modify the tags. Double-click on the tags.
7. Change the blog the article is supposed to be posted on. Click on the account name and select from the drop-down menu.
8. Format or modify the article. Use the WYSIWYG editor.
